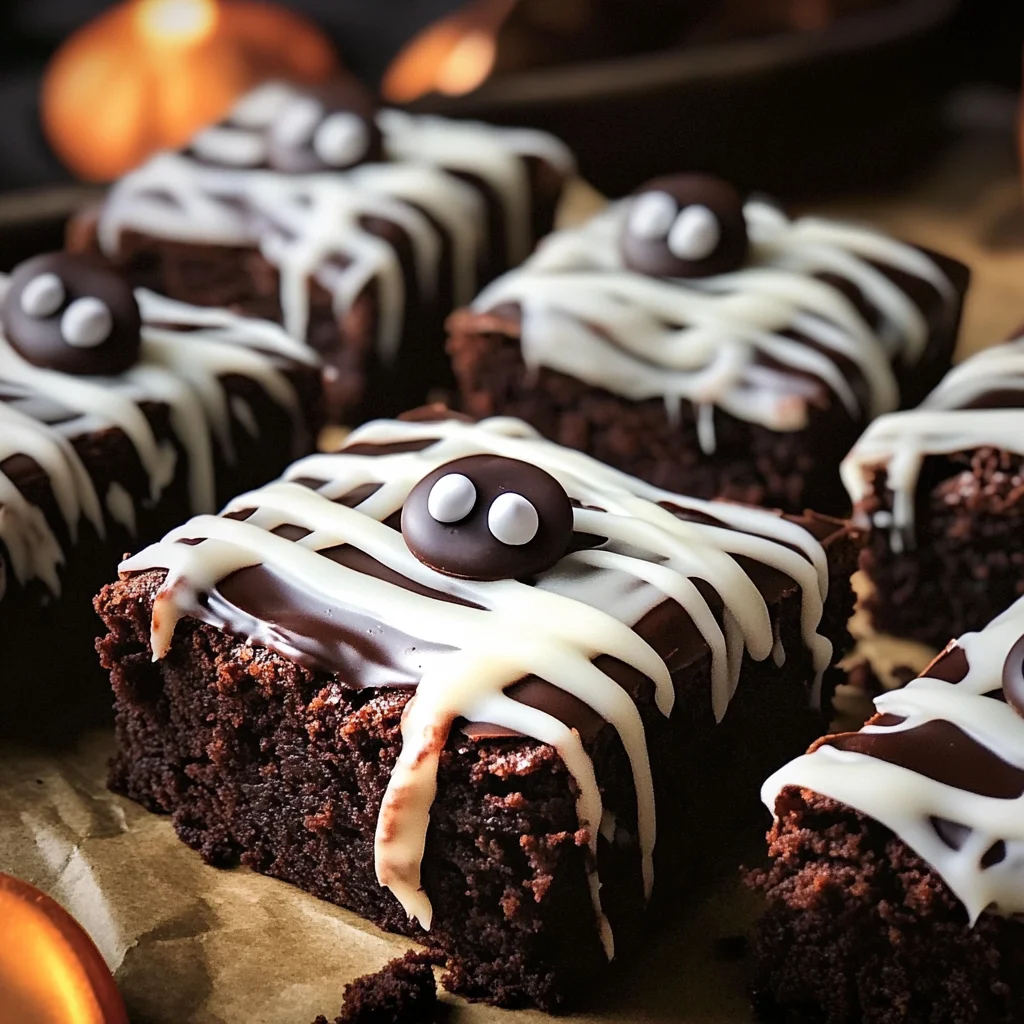
Almost too cute to eat, these spooky mummy brownies are a delightful treat perfect for Halloween or any festive occasion. Their adorable design and rich chocolate flavor make them a hit with kids and adults alike. Get ready to impress your guests with this fun dessert that combines creativity and taste!
Why You’ll Love This Recipe
- Kid-Friendly Fun: Making these brownies is a great activity for children, letting them unleash their creativity.
- Chocolatey Delight: Rich dark chocolate combined with sweet toppings ensures every bite is decadent.
- Easy to Assemble: With simple steps, you can quickly whip these up without hassle.
- Perfect for Parties: These brownies add a whimsical touch to any Halloween gathering or fall celebration.
- Versatile Treat: They can be made ahead of time and stored, making them ideal for busy schedules.
Tools and Preparation
To make your spooky mummy brownies, having the right tools on hand will make the process smoother and more enjoyable.
Essential Tools and Equipment
- 9 x 9 inch cake pan
- Parchment paper
- Microwave-safe bowls
- Stand mixer
- Spatula
- Fork
- Ziptop bag or pastry bag
Importance of Each Tool
- Stand Mixer: Ensures consistent mixing, creating a smooth brownie batter without lumps.
- Parchment Paper: Helps in easy removal of brownies from the pan without sticking.
- Microwave-Safe Bowls: Ideal for melting chocolate evenly without burning.
Ingredients
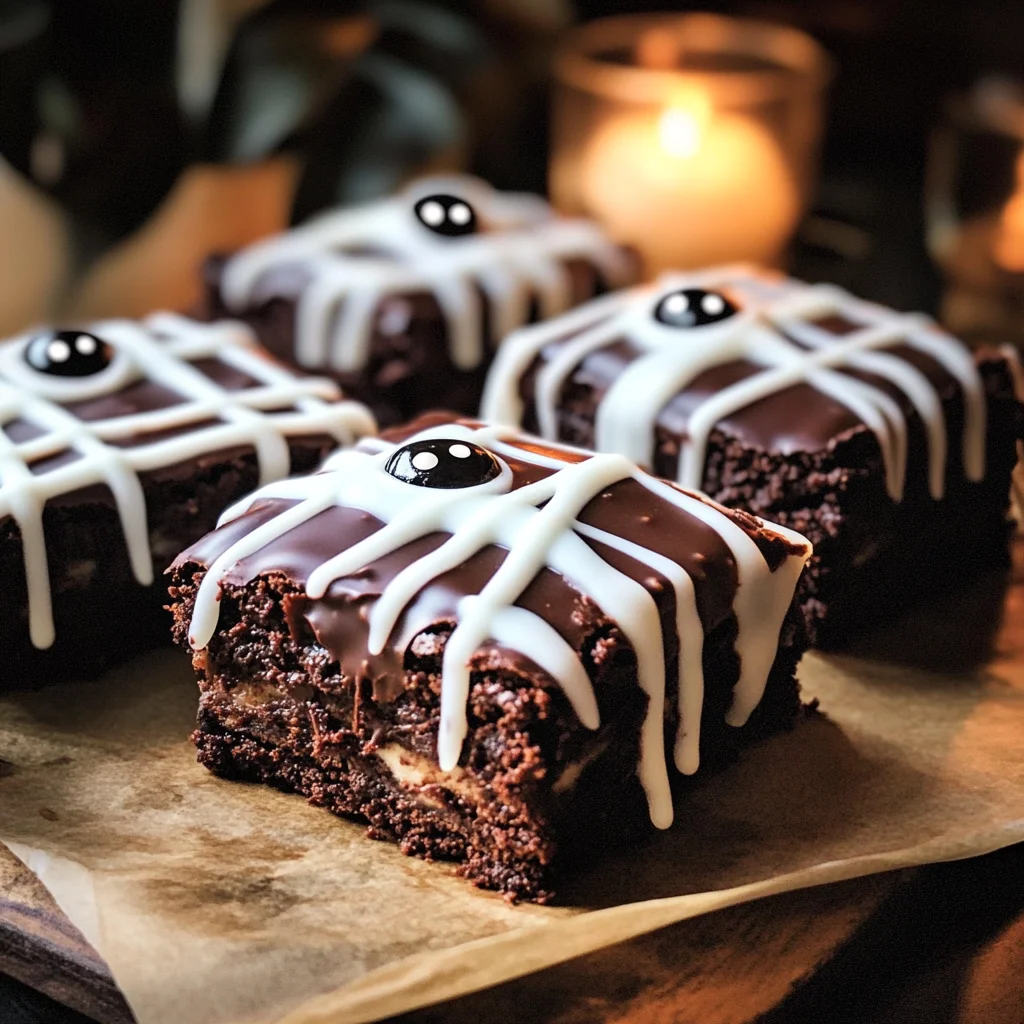
Almost too cute to eat. Honestly, I can’t eat them because they’re way too cute. But so delicious. It’s a moral battle.
For the Brownie Base
- 10 tbsp butter
- 1 1/2 cups dark chocolate chips or chunks
- 1 cup sugar
- 1/4 cup dark brown sugar
- 3 eggs, at room temperature
- 1 tsp espresso powder (optional)
- 2 tsp vanilla extract
- 3/4 cup all-purpose flour
- 1/3 cup unsweetened cocoa powder
- 1/2 tsp baking powder
- 1/2 tsp kosher salt
For the Decoration
- 1 package candy eyes
- 20 oz semi-sweet or milk chocolate chips
- 1 tbsp coconut oil
- 1 cup powdered sugar
- 2-3 tbsp heavy cream, to thin
How to Make spooky mummy brownies
Step 1: Preheat the Oven
Preheat the oven to 350 degrees Fahrenheit. Prepare a 9 x 9 inch cake pan by lining it with parchment paper, ensuring it hangs over the edges for easy removal.
Step 2: Melt Chocolate Mixture
In a microwave-safe bowl:
1. Heat 1 cup of chocolate chips with the butter for 1 minute.
2. Stir until smooth; if needed, microwave for another 20 seconds.
3. Whisk in the sugar and brown sugar until dissolved.
Step 3: Mix Eggs and Chocolate
In the bowl of a stand mixer:
1. Beat the eggs vigorously until frothy (about 2-3 minutes).
2. With the mixer running, stream in the melted chocolate mixture and beat until smooth.
3. Add espresso powder (if using) and vanilla extract.
Step 4: Combine Dry Ingredients
To the chocolate mixture:
1. Add flour, cocoa powder, baking powder, and salt.
2. Beat until just combined.
3. Fold in remaining 1/2 cup of chocolate chips.
Step 5: Bake Brownies
Spread the batter into the prepared baking pan evenly using a spatula:
1. Bake for 25-30 minutes until an inserted toothpick comes out with a few moist crumbs.
2. Allow cooling before cutting into large (or smaller) brownies.
3. Set in freezer for about 15 minutes.
Step 6: Prepare Coating Chocolate
In another microwave-safe bowl:
1. Combine chocolate chips and coconut oil for coating.
2. Heat for 1 minute; stir until smooth (warm additional if necessary).
3. Let cool slightly before use.
Step 7: Coat Brownies
Remove brownies from freezer:
1. Dip each brownie into melted chocolate using a fork to coat all sides evenly.
2. Let excess drip back into the bowl; place on parchment-lined baking sheet.
3. Refrigerate for about 15 minutes to set.
Step 8: Make Bandage Icing
In a bowl:
1. Whisk powdered sugar with one tablespoon of cream until smooth.
2. Add more cream as needed to reach desired thickness (similar to Elmer’s glue).
3. Transfer icing into ziptop bag with one corner snipped or use a pastry bag.
Step 9: Decorate Your Mummy Brownies
Remove brownies from fridge:
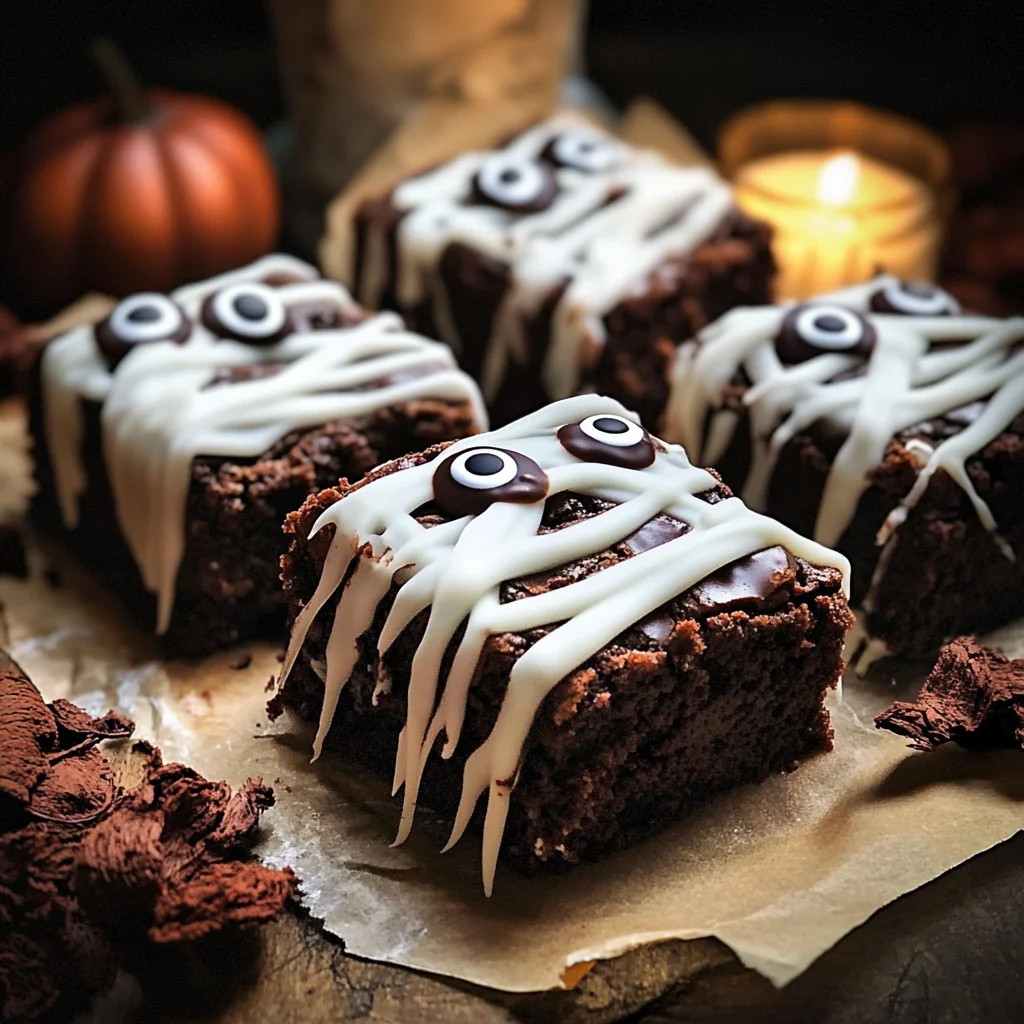
1. Use icing to create crisscross bandages on each brownie.
2. Attach candy eyes onto icing before it hardens.
3. Allow decoration to set for about 10 minutes before serving.
Enjoy your spooky mummy brownies at your next gathering!
How to Serve spooky mummy brownies
These spooky mummy brownies are perfect for Halloween gatherings or any festive occasion. Their cute design makes them a hit with kids and adults alike!
For a Halloween Party
- Serve these brownies on a themed platter. Pair with other Halloween treats like ghost-shaped cookies or pumpkin cupcakes for a delightful spread.
As a Fun After-School Snack
- Pack these brownies in lunchboxes for a sweet surprise that kids will love after school. Add some fruit like apple slices to balance the sweetness.
At Movie Night
- Enjoy these brownies while watching your favorite Halloween films. They pair well with popcorn and candy corn for a fun movie snack mix.
With Ice Cream
- Top the brownies with a scoop of vanilla or chocolate ice cream for an extra indulgent dessert. Drizzle with chocolate sauce to enhance the flavor.
At a Bake Sale
- Wrap each brownie individually in clear cellophane and tie with orange ribbon. They make eye-catching treats that are sure to sell out quickly!
How to Perfect spooky mummy brownies
To ensure your spooky mummy brownies turn out amazing, follow these simple tips.
- Use high-quality chocolate: The better the chocolate, the richer and more flavorful your brownies will be.
- Don’t overmix: Mix just until combined to keep your brownies fudgy and chewy.
- Cool completely: Allow the brownies to cool fully before cutting; this helps maintain their shape.
- Experiment with toppings: Try adding sprinkles or crushed candy corn on top of the icing for added texture and festivity.
- Store properly: Keep leftovers in an airtight container at room temperature for up to three days, or refrigerate for longer freshness.
Best Side Dishes for spooky mummy brownies
Pairing side dishes with your spooky mummy brownies can enhance their appeal. Here are some delicious suggestions:
- Pumpkin Spice Cookies: These soft cookies add a seasonal touch and complement the chocolate nicely.
- Caramel Apples: Sweet, crunchy apples dipped in caramel provide a refreshing contrast to the rich brownies.
- Chocolate Dipped Strawberries: These fruity treats offer a lighter option that pairs well with chocolate flavors.
- Ghostly Marshmallow Pops: Fun and festive, these pops can be made by dipping marshmallows in white chocolate and decorating them like ghosts.
- Candy Corn Trail Mix: A mix of nuts, pretzels, and candy corn creates a sweet-and-salty combo that’s perfect alongside dessert.
- Mini Cheesecakes: Individual cheesecakes can provide a creamy texture that balances the dense brownie experience.
Common Mistakes to Avoid
When making spooky mummy brownies, it’s easy to make a few common mistakes. Here are some tips to ensure your treats turn out perfectly.
- Skipping the Cooling Time: Allowing the brownies to cool is essential. If you cut them too soon, they may fall apart or be too gooey.
- Not Measuring Ingredients Accurately: Precision in measuring ingredients is important for texture and taste. Use dry measuring cups for solids and liquid measuring cups for liquids.
- Using Cold Eggs: Room temperature eggs mix better, leading to a smoother batter. Take your eggs out of the fridge at least 30 minutes before use.
- Overbaking the Brownies: Keep an eye on the baking time. Overbaked brownies can become dry. Start checking a few minutes before the suggested time.
- Neglecting to Prepare the Pan Properly: Using parchment paper helps prevent sticking. Ensure it hangs over the edges for easy removal.
- Rushing the Decorating Process: Let the chocolate coating set fully before applying icing. This helps prevent smudging and ensures clean designs.
Storage & Reheating Instructions
Refrigerator Storage
- Store spooky mummy brownies in an airtight container.
- They can last up to 5 days in the refrigerator.
Freezing spooky mummy brownies
- Wrap individual brownies in plastic wrap or aluminum foil.
- Place them in a freezer-safe bag or container, where they can last up to 3 months.
Reheating spooky mummy brownies
- Oven: Preheat your oven to 350°F (175°C). Place brownies on a baking sheet and warm for about 5-10 minutes.
- Microwave: Heat each brownie on a microwave-safe plate for about 10-15 seconds until warmed through.
- Stovetop: Use a skillet over low heat with a lid for about 5 minutes, ensuring they don’t burn.
Frequently Asked Questions
Here are some common questions regarding spooky mummy brownies that might help you with your baking adventure.
How do I make spooky mummy brownies?
To make spooky mummy brownies, follow the recipe instructions carefully, ensuring you prepare all ingredients and decorations as outlined.
Can I customize spooky mummy brownies?
Absolutely! You can add nuts, swap chocolate types, or even use colored icing for different effects.
What if I don’t have espresso powder?
You can skip the espresso powder if you don’t have it; it enhances chocolate flavor but is not necessary for success.
How should I store leftover spooky mummy brownies?
Store any leftovers in an airtight container in the refrigerator for up to five days or freeze them for later enjoyment.
Can children help decorate these spooky mummy brownies?
Yes! These treats are perfect for kids to help with decorating; just supervise during melting chocolate and using sharp tools.
Final Thoughts
Spooky mummy brownies are not only delicious but also visually appealing, making them perfect for Halloween gatherings or any festive occasion. With their rich chocolate flavor and fun decorating options, you can easily customize these treats to suit your style. Don’t hesitate to experiment and make them your own – get creative and enjoy every bite!
Spooky Mummy Brownies
- Total Time: 50 minutes
- Yield: Approximately 16 servings 1x
Description
Indulge in the charm of spooky mummy brownies, a delightful treat that brings festive flair to any Halloween gathering! These rich chocolate brownies are not only adorable but also incredibly delicious, making them a hit with both kids and adults. Their unique design allows for endless creativity during decoration, inviting little hands to join in the fun. With simple ingredients and easy steps, you can craft these spooky delights in no time. Perfect as a festive dessert or a playful snack, these brownies will surely impress your guests and make your celebrations even more special!
Ingredients
- 10 tbsp butter
- 1 1/2 cups dark chocolate chips
- 1 cup sugar
- 1/4 cup dark brown sugar
- 3 eggs (room temperature)
- 2 tsp vanilla extract
- 3/4 cup all-purpose flour
- 1/3 cup unsweetened cocoa powder
- 1/2 tsp baking powder
- 1/2 tsp kosher salt
- 20 oz semi-sweet chocolate chips (for coating)
- 1 tbsp coconut oil
- 1 cup powdered sugar
- 2–3 tbsp heavy cream
Instructions
- Preheat the oven to 350°F (175°C) and line a 9×9 inch cake pan with parchment paper.
- In a microwave-safe bowl, melt together the butter and chocolate chips. Stir until smooth, then mix in the sugars.
- In a stand mixer, beat the eggs until frothy. Gradually add the melted chocolate mixture and vanilla extract.
- Combine flour, cocoa powder, baking powder, and salt; mix into the chocolate mixture until just combined.
- Spread batter evenly in the prepared pan and bake for 25-30 minutes. Let cool completely before cutting.
- Prepare coating by melting remaining chocolate chips with coconut oil; dip cooled brownies and let set in the fridge.
- Create icing from powdered sugar and cream, then decorate brownies with bandage designs and attach candy eyes.
- Prep Time: 20 minutes
- Cook Time: 30 minutes
- Category: Dessert
- Method: Baking
- Cuisine: American
Nutrition
- Serving Size: 1 serving
- Calories: 220
- Sugar: 16g
- Sodium: 65mg
- Fat: 12g
- Saturated Fat: 7g
- Unsaturated Fat: 5g
- Trans Fat: 0g
- Carbohydrates: 26g
- Fiber: 2g
- Protein: 3g
- Cholesterol: 40mg

